
The Tools Await: 3 fixes and many tools complete a thorough ABC Quick Check
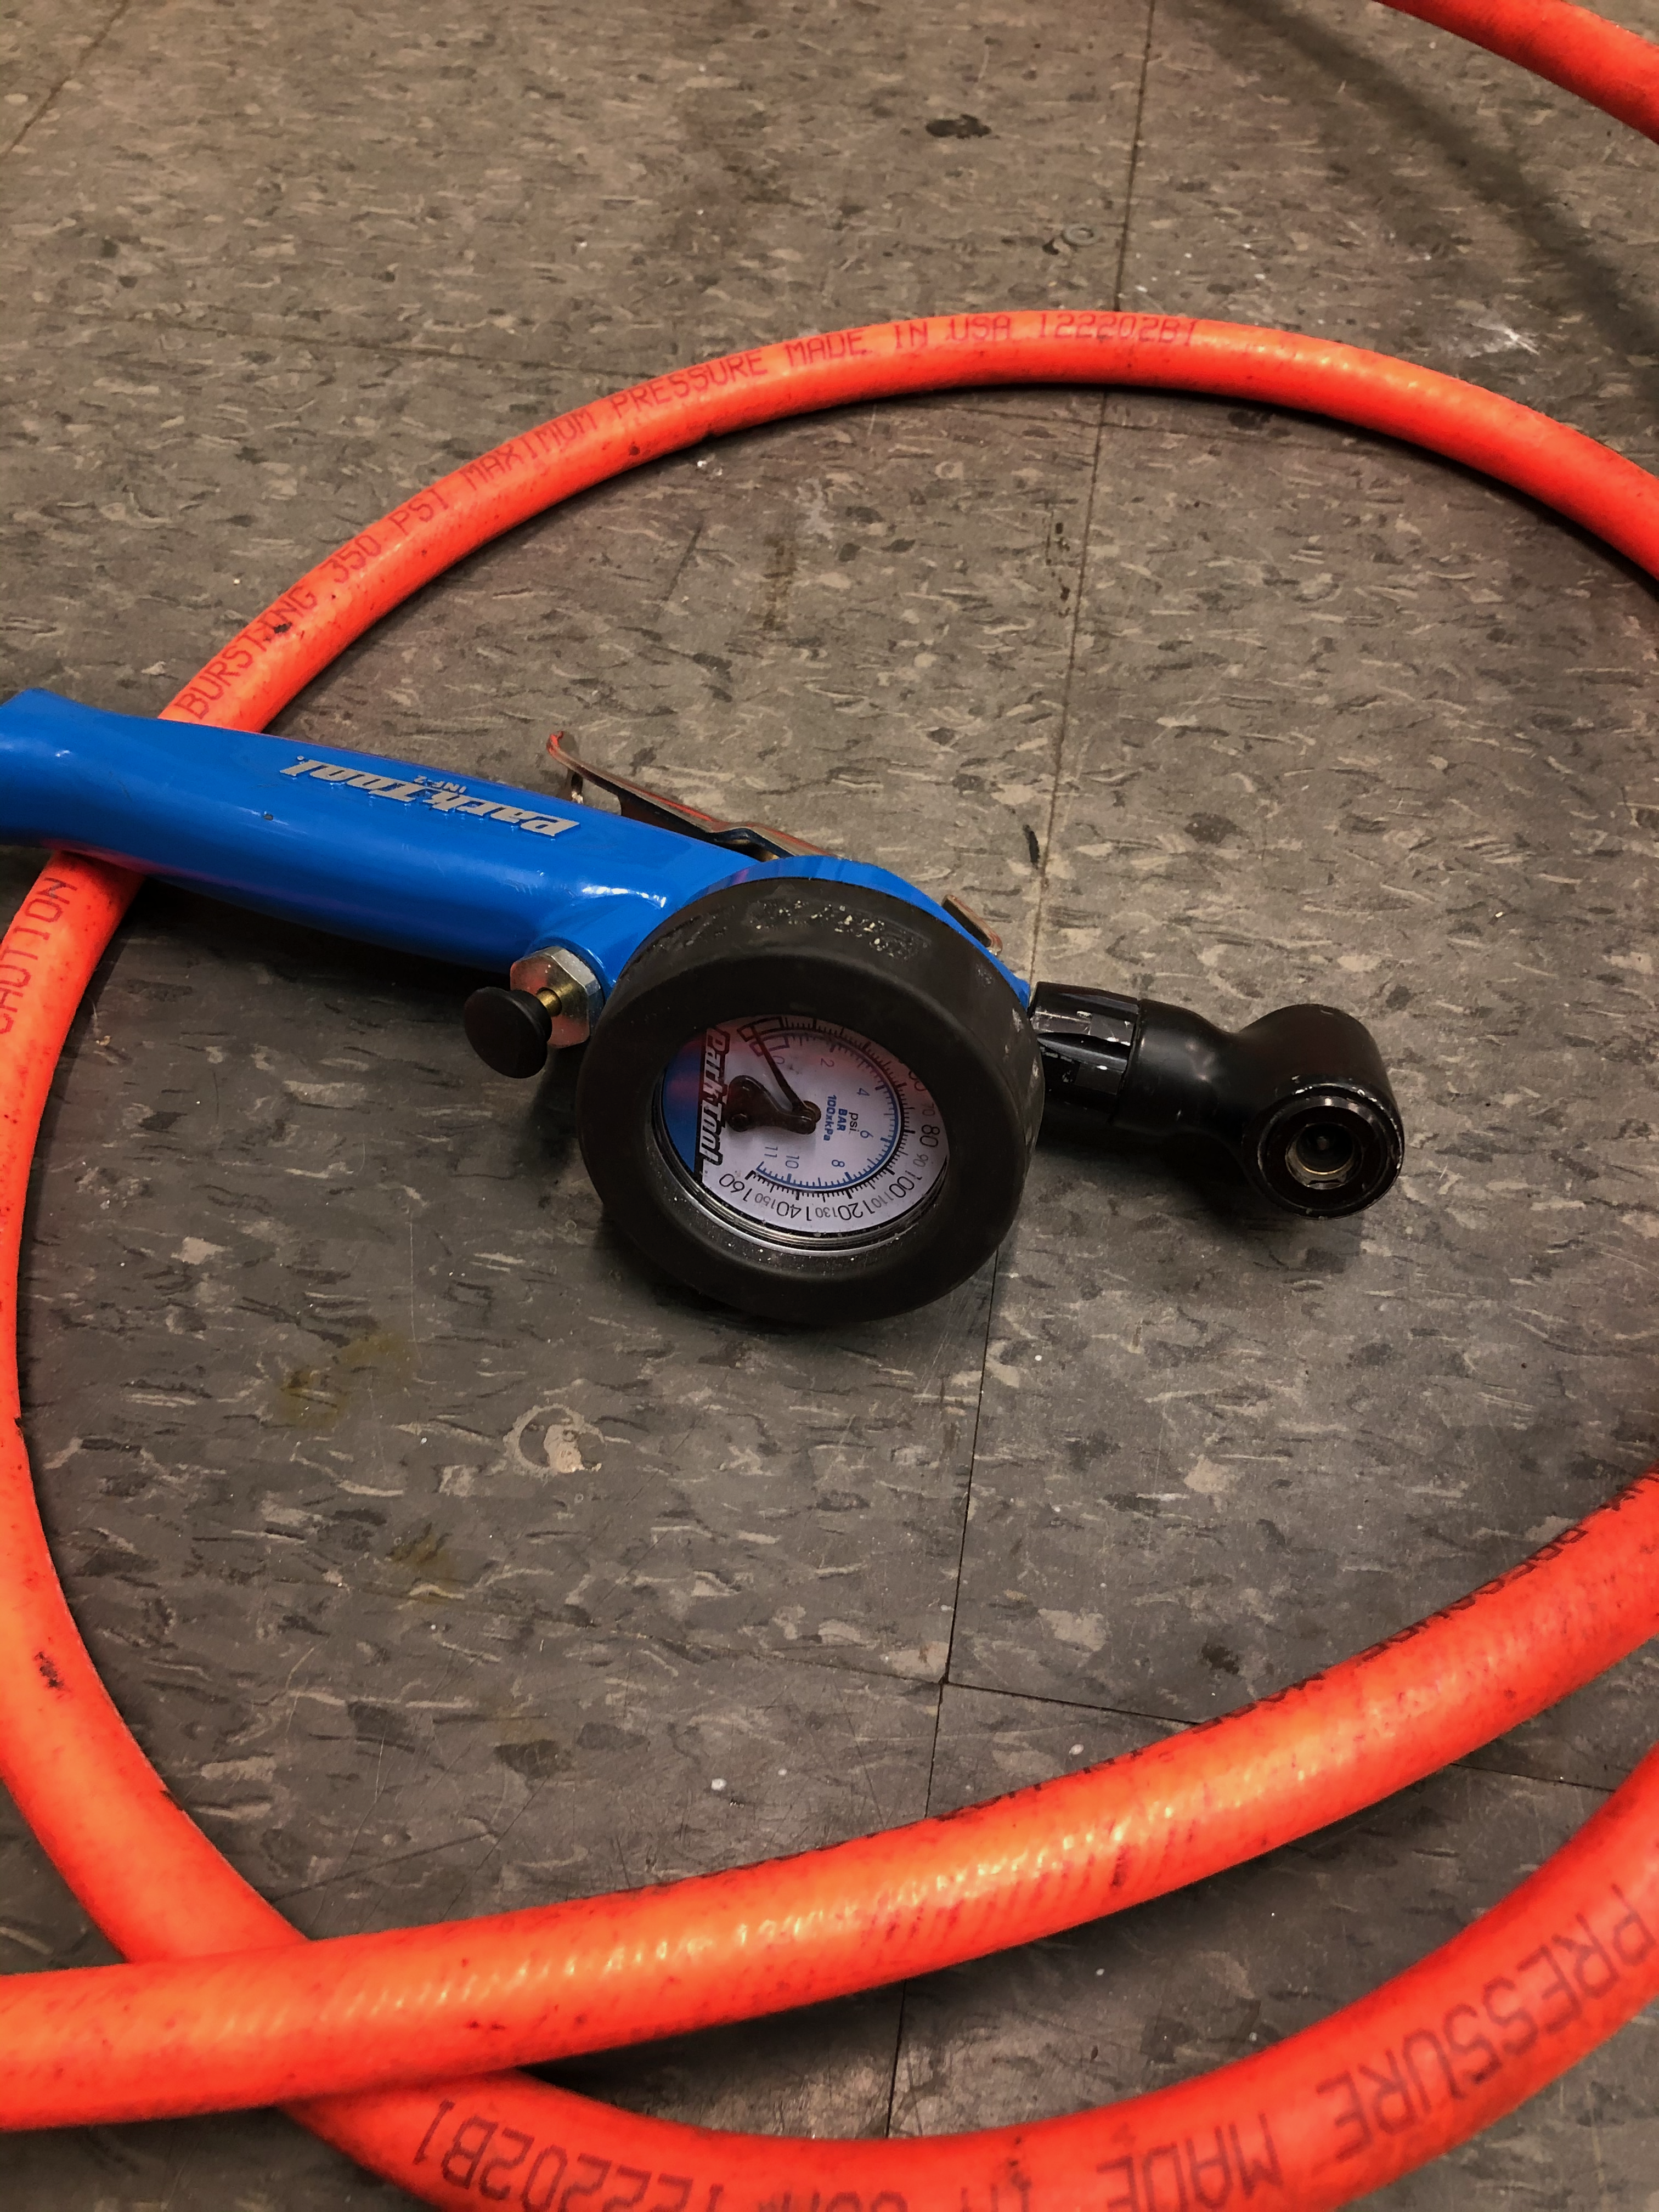
The business end of the compressor pump. For speedily inflating tires.
How many tools does it take to inflate two tires? That depends on how many other fixes you have time for. The list at the end tells which BiCi Co tools it took to handle the tires and adjustments to shifting and brakes.
After months out of town, I returned to my bike. Of course, the tires had deflated since my last ride in July. So I hoisted the bike onto the rack of the 33 bus and talked cycling with Desmond the bus driver till we reached Hudson & Park.
For once I beat Chris Brown, Monday DIY mentor, to the DIY hours that start at 5:30 pm. That bus ride took less time than I’d expected. Thanks, Desmond.
Tools for tires
Inflating the tires took next to no time. It would have taken no time at all if I hadn’t needed Chris to remind me to open the Presta valves before using the very efficient compressor pump. Five and a half months must be long enough for me to forget some basics. But Chris never rolls eyes or expresses disdain in tone of voice. I’m allowed to make fun of myself, however. Thanks, Chris; I’m truly grateful. As usual.
With plenty of DIY hours left, it was a no-brainer to do a thorough ABC Quick Check while I had a coach and a workshop full of tools. A cursory ABC Quick Check is advised before every ride. A thorough one makes sense whenever we’ve set aside our bikes for a while.
ABC Quick Check: the cycling preflight checklist
A is for air. Done.
B is for brakes.
C is for cranks and everything about the chain drive. If you have a carbon frame, inspect it for cracks, too, under C.
Quick is for inspecting all quick-release levers and making sure they’re secured.
Check is for a brief test ride to find out if anything else is out of whack.
B is for brakes
Pads OK. They’re not worn down, and they align correctly to the rims.
On the other hand, the rear brake mechanism doesn’t hold its position reliably. I tighten it frequently; it continues to slip around. I’ve coped by simply spinning the rear wheel before each ride to make sure the brake pads don’t rub, doing a quick fix with my multitool if necessary. That’s less than ideal.
Chris shows the pieces to tighten to keep the brake from slipping out of position. Oh, no wonder it slips all the time. I hadn’t known to tighten three places. It was great to have an extra hand to help manage all the moving parts.
“Now squeeze the brake lever, let it snap back open, and then check the brakes again,” Chris said. After a few rounds of corrections, the brakes stay in place, properly adjusted. For the first time in months, in fact, despite “by the way” help in two commercial shops and a couple rushed attempts before DIY hours ended on other days. I guess it pays to arrive at the beginning of the DIY session once in a while.
(Weekday evening DIY sessions on Mondays and Wednesdays start at 5:30 pm and run to 8:30, but we need quit repairing to clean up before the last minute for on-time departure. Saturday hours currently: 1:30 pm till 5:30 pm.)
C is for cranks and chain
It’s easy to check the cranks by grasping the pedal arms and attempting to move them to check for lateral play in the bottom bracket. And to listen and feel for that crunchy sensation that indicates worn bearings. My crank’s OK: no play, no crunching. My frames’s not carbon. On to the chain.
It takes only a minute to check that the chain’s in place by pedaling. Pedaling backward is the easiest way. Anyone who cycles frequently can tell tales about skipping this simple test and then discovering the awkward way that something happened while the bike was parked for 15 minutes, or 15 hours. Better to find out and place the chain back on the gears before riding into traffic.
Shifting adjustments
My chain’s in place, but I take the extra step of running through the gears because it’s been so long since my last ride. Right, I remember now, there’s sloppiness while shifting on the free wheel.
Plus, there’s enough time to try something new. I’d recently been challenged by an instructor to try my bike’s built-in capacity to instantly switch from friction shifting to indexed shifting. I’m old school: skinny tires, toe clips, curly handlebars, and friction shifting on a light touring bike like the ones I loved as a teenager when I first opted for a bike instead of a car. But I did agree to try indexed shifting.
So, OK, Chris, what do I do now? I’ve turned the selector to indexed shifting, and now the chain skips over the second largest gear. We eyeball the alignment of the derailleur cage compared to the gears. Chris is right; the derailleur’s not quite aligned. It works well enough for friction shifting, which is more forgiving of slight misalignment. It’s not precise enough, though, to click the chain into place with indexed shifting.

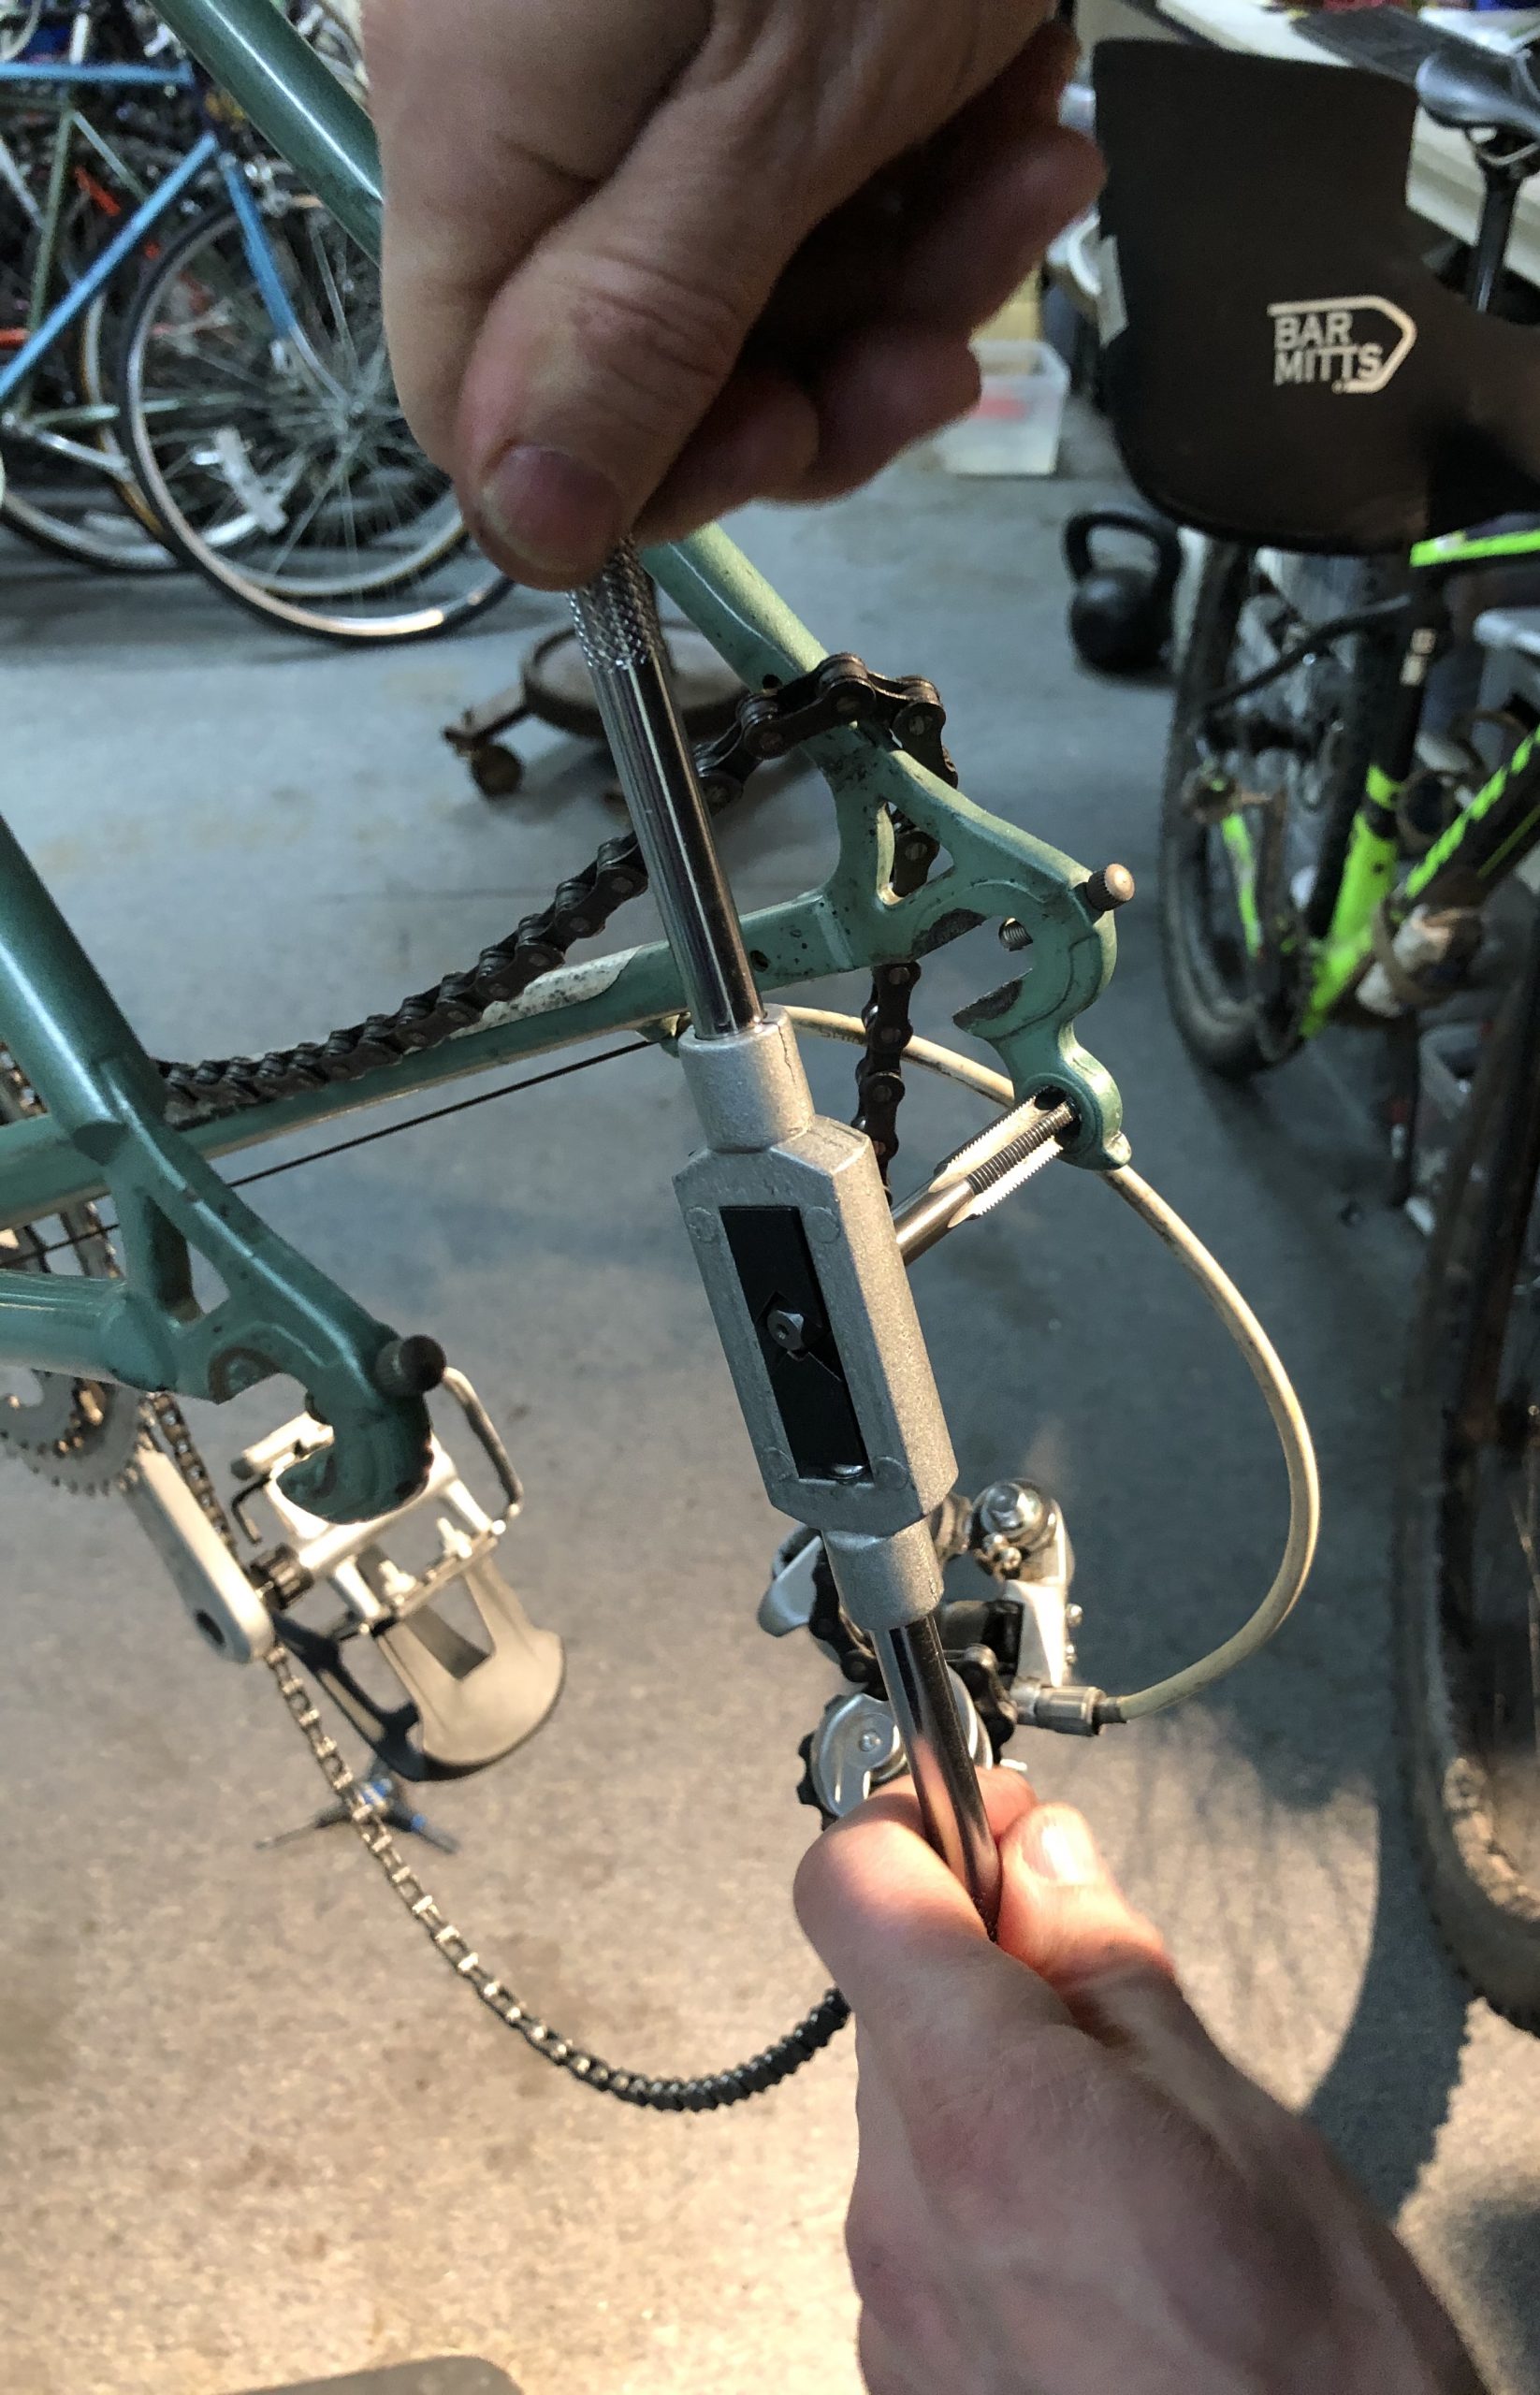
BiCi Co’s derailleur hanger alignment gauge holds pride of place on the tool board.
Chris presents a tool I’ve never used, the impressively named derailleur hanger alignment gauge (DHAG). It has such an exalted place on the tool board that I can’t reach it without a step stool. To put it to use, first I remove the back wheel and the derailleur. Chris shows how to set up the gauge to diagnose incorrect alignment of the tab where the derailleur’s bolted onto the frame. Chris manages it handily; I’d need more coaching and practice to do it myself. The tab needs a little gentle nudging with the gauge, which also acts as a lever, to straighten it out. I can manage that part, which just takes a little force applied gingerly. Even after the tab aligns, the chain still skips over an inner cog of the freewheel.
Next thing to check, Chris explains, is whether the derailleur itself is seated evenly in the frame. That means removing the derailleur, reseating it, and testing the gears again. Removal goes well. I clean up the pieces a bit, add a little green grease, and start turning the derailleur back onto the frame, keeping an eye on the set screw. Ummm…it’s balking. I can’t seem to make the threads align. Chris coaches me. I’m afraid I’ll wreck the threads; I’m seeing paint flecks dislodge, and that doesn’t seem right. Chris inspects and confirms that the threads in the hanger eye are a little rough.
Tapping underway to clean up the threads in the eye of a bike’s derailleur hanger
Time to meet the tapping set. That’s a group of calibrated cutting tools that you feed the wrong way through a threaded opening to clean up the threads. It’s a small manually operated machine tool, essentially.
It seems like an extreme act to me, to change the metal of my frame. Even just the tiny metal spiral within the hole of the derailleur hanger tab. Consistently calm Chris acts as if it’s routine. So, OK, show me how. Chris selects the right tap and shows how to fit it into the turning handle. Then Chris demonstrates how to turn it and then back it up frequently to allow any tiny metal filings to slip into the openings for them in the tap.
Success! The derailleur goes back into place easily, and the chain moves smoothly after everything’s back in place.
Quick is for quick release
Back to the ABC Quick check. Time to look at all the quick-release levers and make sure they’re closed before I ride out into the 19-degree night.
Not all bikes have quick-release levers. Mine have five, one for each hub and each set of brakes, and one for the seat. Know your bike and check all your quick-release fittings before each ride. Take special care with bikeshare bikes or any borrowed ride.
- Seat post: check.
- Brakes: check.
- Hubs: Yipes! My front wheel wasn’t seated properly in the frame. It hadn’t mattered on the way in because I was just rolling my under-inflated wheels, not riding. Good thing I checked, even though I hadn’t touched my front wheel in the shop.
As I keep reminding myself, ABC Quick Check: it’s not just theoretical.
Check is for check-it-out test ride
We all prepared for the cold and left the shop. I switched on my lights and enjoyed a little Check ride to complete the ABC Quick Check. The bike is ready to roll for an exceptionally smooth ride to a nice warm home.
The tools
My personal slogan for the BiCi Co DIY workshop is “The Tools Await.” The abundance—specialized bike tools and precision gauges—made me gawk the first time I visited the BiCi Co community workshop. It still amazes me that an affordable day pass or 10 volunteer hours or $100 a year grants us access to such great tools during DIY hours. It feels like bike-repair paradise to me. No one I know has such a great collection of tools at home.
Used to complete three fixes:
- Compressor pump
- Stable, sturdy, and easy-to-adjust repair stand
- Derailleur hanger alignment gauge
- Tapping set (with M10*1.0 tap)
- Pick (mini sized)
- 5mm Allen wrench
- 6mm Allen wrench
- Triple Allen wrench
- Brake wrench (2)
- Crescent wrench
- Flat-tip screwdriver
- Green grease & applicator
- Tri-Flow lubricant
- Rags
Those 16 items are just a few of the tools and supplies that await in the BiCi Co workshop and community classroom.
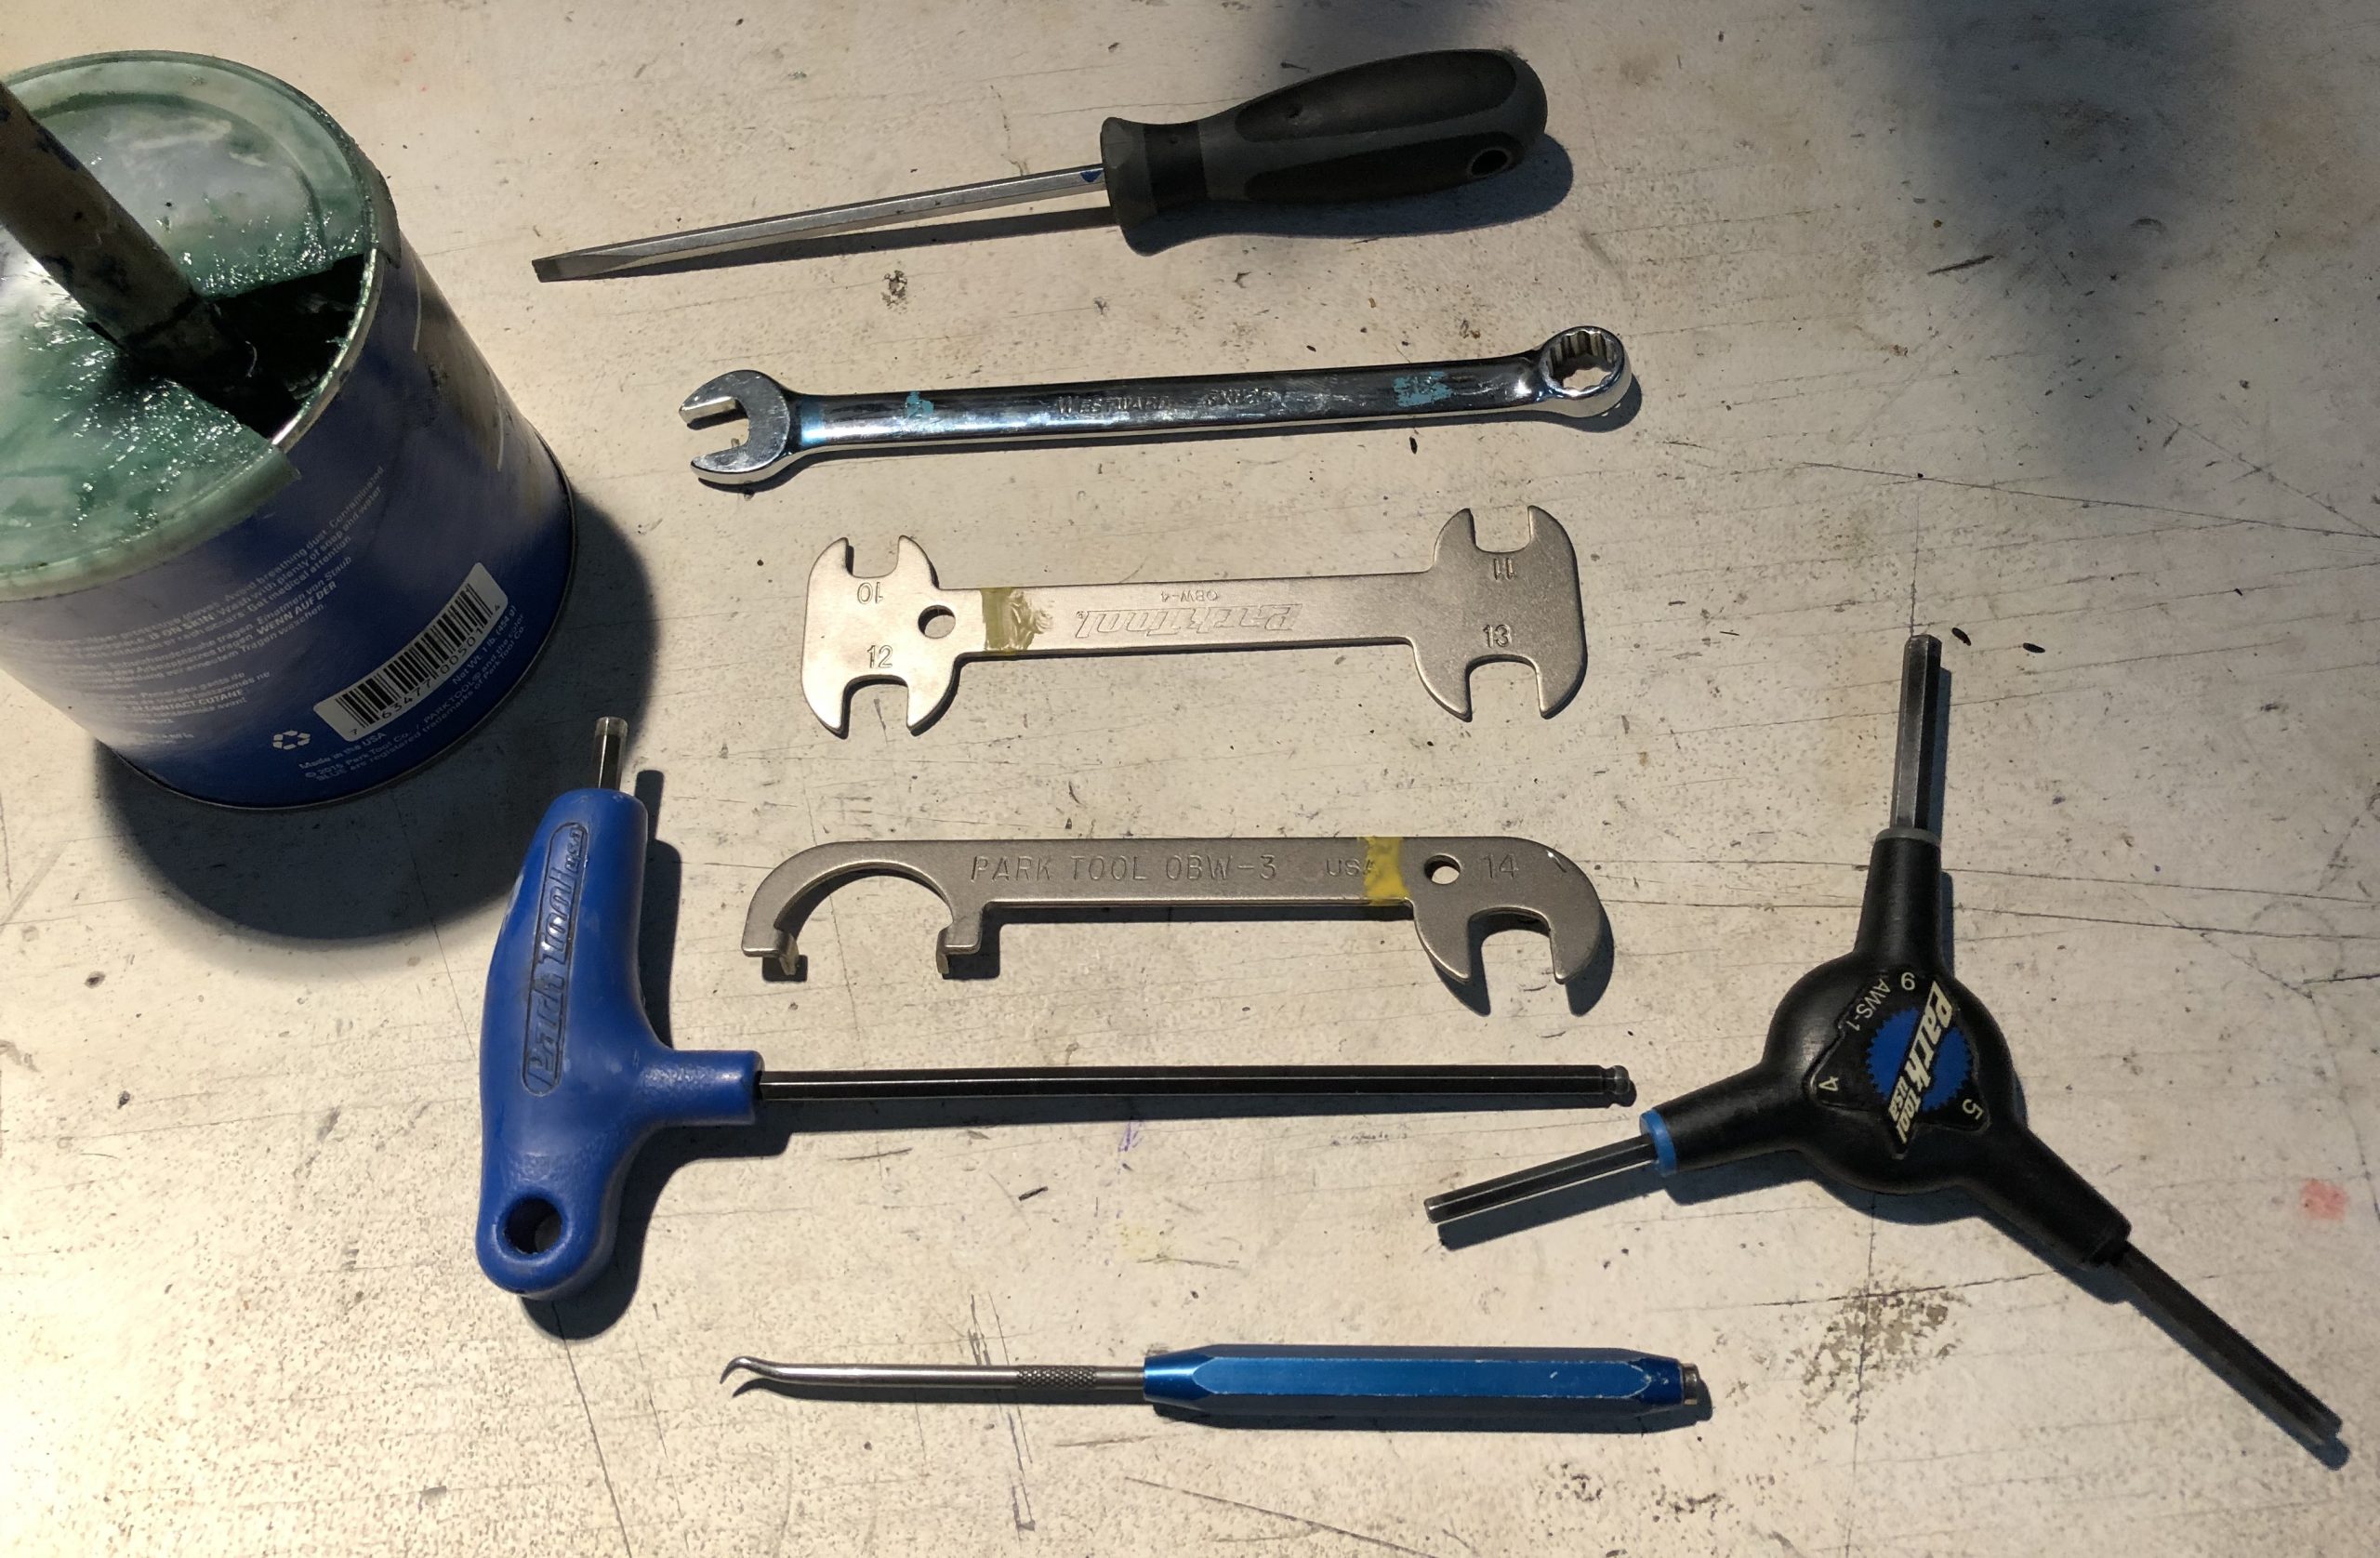
Selected tools used for fixes found necessary during a thorough ABC Quick Check
What tools do you need for keeping your ride in good shape?
See you in the workshop!
Other resources & wintertime workshop opportunities
View a video about a minute and a half long about the ABC Quick Check in the library of the League of American Bicyclists.
Winter 2020 DIY hours, January & February: Femme DIY Mondays 5:30 to 8:30 pm (open to all women, girls, nonbinary, and femme-identifying folks). Member DIY hours for everyone: Wednesdays, 5:30 to 8:30 pm. Saturdays, 1:30 to 5:30 pm. Open to all members: $5 per day, volunteers hours, or $100 per year.
Winter 2020 retail & service shop hours, January & February: Wednesday and Friday, noon to 8:30 pm; Saturdays, 10 am to 6 pm. Other hours by appointment: call the shop and leave a message (860) 269-0004.
Pitch in and put your bike repair skills to work upcycling donated bikes for this year’s youth BikeLIFE bike skills and access program that takes place annually during Hartford Public Schools spring break on Friday evenings in the workshop until 100 bikes estimated needed for the program are road ready. It’s great social time in the workshop.